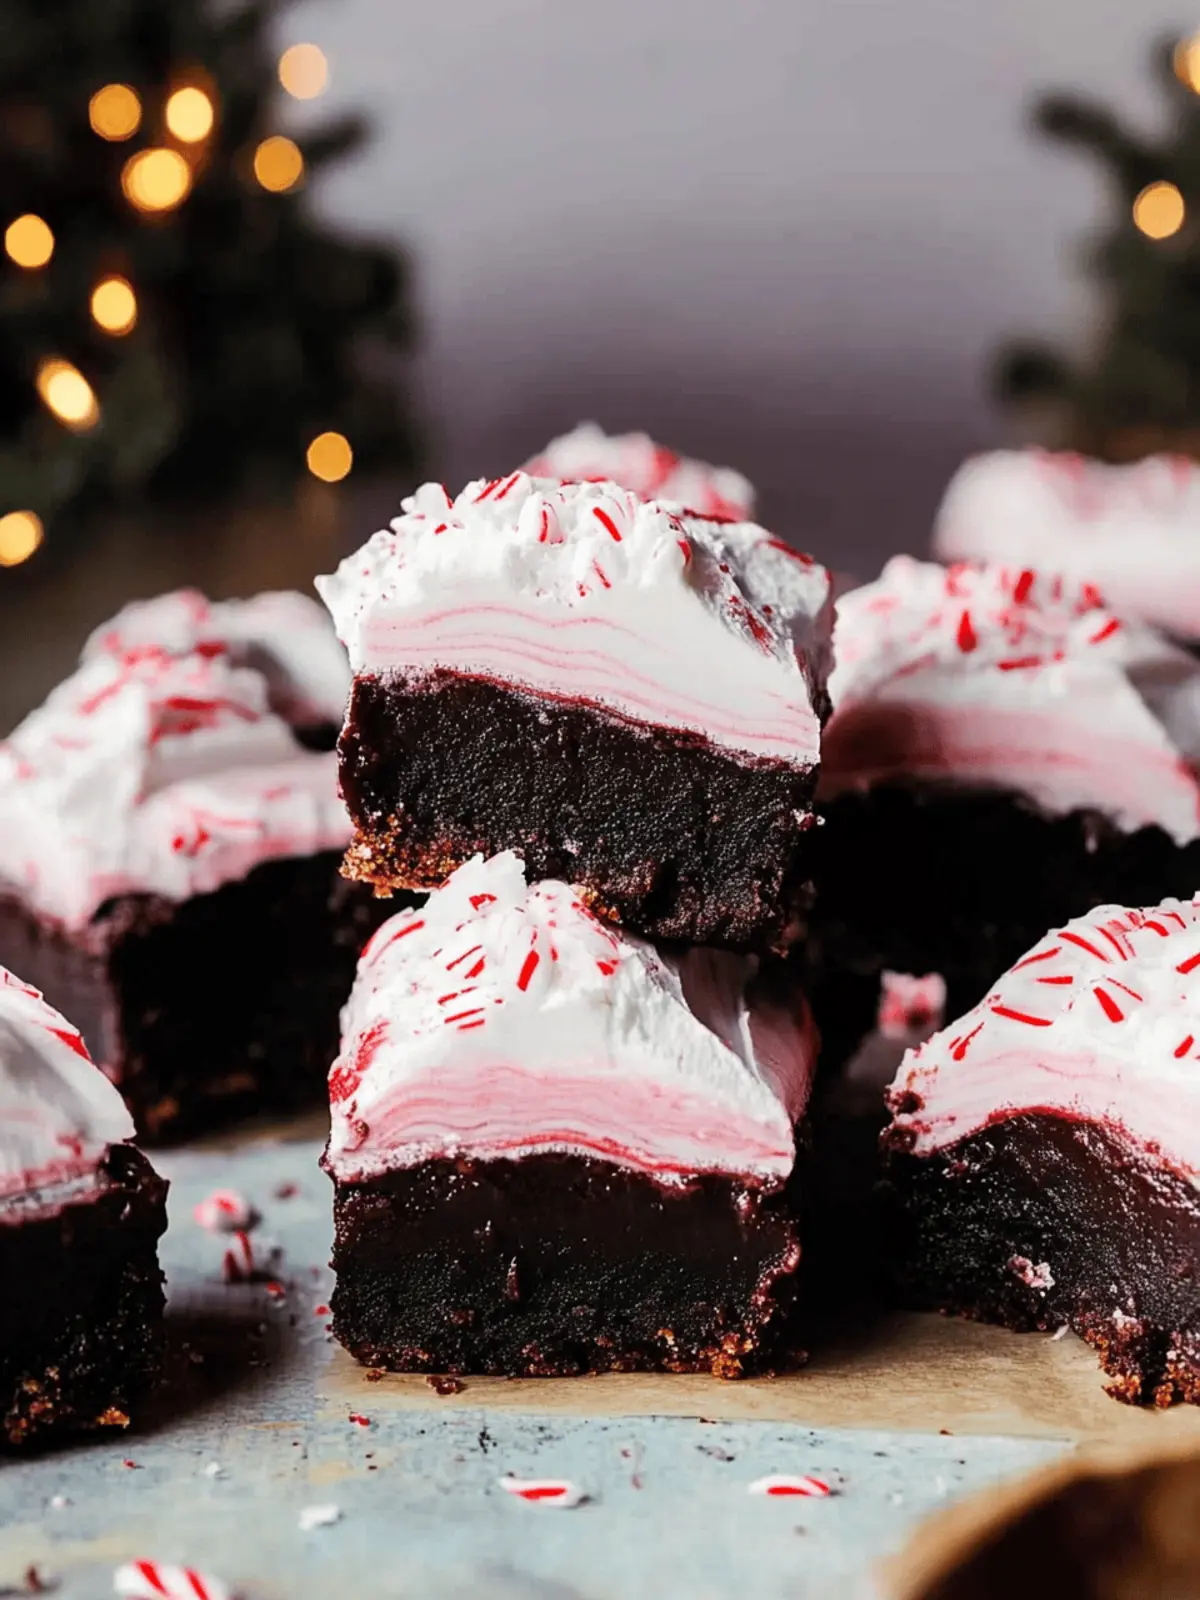
As the holidays approach, the scent of peppermint and chocolate becomes almost irresistible, igniting a nostalgia that wraps around me like a cozy blanket. The first time I made these peppermint hot fudge bars, it was a chilly December evening, and I was on the hunt for a festive treat that could impress family and friends. The surprise and delight on their faces were absolutely unforgettable!
These bars are a harmonious blend of rich chocolate and refreshing peppermint, creating a dessert that’s both indulgent and perfect for sharing. With just 16 minutes of baking time, they may look elegant and complex, but they’re surprisingly simple to make, making them a crowd-pleaser even for those who claim they can’t bake. And the best part? You can adapt them easily for various gatherings, whether it’s a winter holiday party or a cozy night in with loved ones.
Join me as I guide you through this delightful recipe, perfect for satisfying your sweet tooth while bringing a festive spirit to your kitchen!
Why love peppermint hot fudge bars?
Festive Delight: These bars are bursting with holiday cheer, combining rich chocolate layers with a refreshing peppermint twist.
Quick Prep: With just 16 minutes of baking time, you’ll be enjoying this indulgent treat in no time!
Elegant Presentation: The glossy hot fudge topping and fluffy meringue make these bars look gourmet, perfect for impressing your guests.
Crowd-Pleasing Flavor: The sweet and minty flavors create a harmonious blend that appeals to everyone, from kids to adults!
Customizable Options: Add extra toppings like crushed cookies or different candies—let your creativity shine!
Simple Steps: Even novice bakers will find the preparation straightforward, making it a terrific recipe to share with family or friends.
Peppermint Hot Fudge Bar Ingredients
For the Cookie Base
• Salted butter – 14 and 1/2 tbsp; melted for a perfectly rich flavor.
• Cocoa powder – 1/2 cup + 1 tbsp; ensures a deep chocolatey taste for your peppermint hot fudge bars.
• Espresso powder – 1/2 tsp; enhances the chocolate flavor for a more decadent experience.
• Brown sugar – 3/4 cup, packed; adds moisture and depth of sweetness.
• Granulated sugar – 3/4 cup; balances the richness of the brown sugar.
• Large eggs – 2; essential for structure and moisture.
• Vanilla extract – 1 and 1/2 tsp; for a warm, sweet aroma.
• Peppermint extract – 1/2 tsp; infuses that delightful holiday flavor.
• All-purpose flour – 2 and 2/3 cups; forms the base of your bars for the perfect texture.
• Baking powder – 1 tsp; leavens the bars for a soft, chewy bite.
• Baking soda – 1 tsp; supports the rise and texture of the cookie base.
• Salt – 1/2 tsp; enhances all the flavors beautifully.
• Dark chocolate chips – 1 cup; provides a rich contrast in flavor.
• Semi-sweet chocolate chips – 1 cup; adds sweetness and gooeyness.
For the Hot Fudge Topping
• Evaporated milk – one 12 ounce can; creates a creamy and smooth fudge texture.
• Granulated sugar – 1/2 cup; sweetens the fudge to perfection.
• Vanilla extract – 1 and 1/2 tsp; enhances the depth of flavor in the fudge.
• Peppermint extract – 1 tsp; intensifies the peppermint flavor in the topping.
• Salted butter – 1 tbsp; adds richness to the fudge, making it luscious.
For the Meringue Topping
• Large egg whites – 4; provides the structural base for fluffy meringue.
• Granulated sugar – 1 cup; essential for achieving glossy, stiff peaks.
• Cream of tartar – 1/2 tsp; stabilizes the meringue for a perfect texture.
• Salt – 1/8 tsp; balances the sweetness.
• Vanilla extract – 2 tsp; adds warmth and flavor to the meringue.
• Red food coloring – for a festive touch; swirl in for a beautiful marbled effect.
• Crushed candy canes – for garnish; adds a delightful crunch and extra peppermint flavor.
How to Make Peppermint Hot Fudge Bars
-
Preheat your oven to 350°F. Grab a 9×9 metal pan, spray it with nonstick spray, and line it with parchment paper for easy removal later on.
-
Melt the butter in a large mixing bowl. Next, whisk in the cocoa powder and espresso powder, followed by the brown and granulated sugars until smooth. Incorporate the eggs, vanilla, and peppermint extract, blending until combined.
-
Combine the dry ingredients. Stir in the flour, baking powder, baking soda, and salt, making sure to mix well and catch any dry bits hiding at the bottom.
-
Press the dough into your prepared pan, spreading it out evenly. Bake for 16 minutes until set, then cool in the pan on a wire rack until completely cooled.
-
Prepare the hot fudge. In a medium saucepan, combine the chocolates, evaporated milk, and sugar. Heat on medium until it just reaches a low boil, stirring constantly. Remove from heat and mix in the butter, vanilla, and peppermint.
-
Cool the hot fudge slightly, then pour 2 cups over the cooled bars. Place them in the fridge for a few hours or overnight until the fudge is perfectly set.
-
Whip up the meringue by following your recipe. Once it’s fluffy, add a touch of red food coloring and gently swirl it in. Pile the meringue on top of the chilled fudge layer and spread it out with a spoon. If you’d like, sprinkle crushed candy canes on top for some festive flair.
-
Chill the bars in the fridge for up to 24 hours before serving, or slice and serve them after a quick 30-minute rest in the fridge. Store leftovers in an airtight container for 3-4 days.
Optional: Drizzle some extra hot fudge on top before serving for an extra indulgent treat!
Exact quantities are listed in the recipe card below.
Make Ahead Options
These peppermint hot fudge bars are perfect for meal prep and can save you a lot of time during the busy holiday season! You can make the cookie base and hot fudge up to 24 hours in advance; simply bake the cookie layer and allow it to cool completely before adding the fudge topping. Once prepared, refrigerate the bars to maintain their freshness. Additionally, the meringue can be made ahead and added right before serving for that perfect fluffy finish—just find a cool spot to keep it until you’re ready. When you’re ready to serve, slice the bars and garnish with crushed candy canes for a delightful presentation, ensuring everyone enjoys just as delicious a treat!
How to Store and Freeze Peppermint Hot Fudge Bars
Fridge: Store leftovers in an airtight container in the fridge for up to 3-4 days to keep them fresh and flavorful.
Freezer: For longer storage, wrap the bars tightly in plastic wrap and place them in a freezer-safe container. They can be frozen for up to 2 months.
Thawing: To enjoy your frozen peppermint hot fudge bars, thaw them overnight in the fridge before serving, or leave them at room temperature for a couple of hours.
Reheating: If you prefer them warm, place them in the microwave in short bursts of 10-15 seconds until heated through, but be careful not to overheat!
What to Serve with Peppermint Mocha Cookie Bars?
These delightful peppermint mocha cookie bars are the perfect festive treat to accompany your holiday gatherings or cozy nights in.
- Rich Hot Cocoa: A warm cup of cocoa complements the chocolatey layers beautifully, enriching the overall experience with its creamy goodness.
- Vanilla Ice Cream: The coolness of vanilla ice cream offers a delightful contrast to the warm, fudgy bars, creating a dreamy dessert duo.
- Espresso: Serve a cup of bold espresso alongside for coffee lovers—its robust flavor enhances the mocha elements in the bars impeccably.
- Peppermint Tea: A soothing cup of peppermint tea refreshes the palate, balancing the sweetness of the bars while echoing their festive flavors.
- Chewy Ginger Snaps: The spicy zing of ginger snaps adds a delightful crunch and spice that pairs wonderfully with the chocolate and peppermint notes.
- Spiced Apple Cider: A warm glass of spiced apple cider brings a comforting, fruity element that perfectly contrasts the richness of the bars.
- Caramel Drizzle: Consider a drizzle of caramel on top for an extra indulgent touch; it adds a luscious sweetness that pairs well with peppermint.
- Holiday Fruit Salad: A refreshing fruit salad with seasonal fruits cuts through the richness, adding a bright and colorful touch to your dessert spread.
Expert Tips for Peppermint Hot Fudge Bars
Measure Accurately: Weigh your ingredients, especially the flour, to avoid dry bars. Spoon and level for accurate measurements.
Don’t Overmix: After adding flour, stir just until combined. Overmixing can lead to tough bars, so be gentle!
Cool Completely: Allow the bars to cool completely before adding hot fudge to prevent it from melting into the cookies.
Customize Toppings: Get creative with the crushed candy canes. Try adding crushed cookies or nuts for added texture and flavor in your peppermint hot fudge bars.
Whip Meringue Properly: Ensure your mixing bowl and beaters are perfectly clean to achieve stiff peaks for meringue. Any fat can prevent it from whipping well.
Chill Before Serving: For the best texture, chill the bars for a few hours after layering with fudge and meringue before slicing.
Peppermint Hot Fudge Bars Variations
Feel free to get creative and make these delightful bars your own with some exciting twists!
-
Gluten-Free: Substitute all-purpose flour with a gluten-free blend for a deliciously inclusive treat. Your friends with dietary restrictions will appreciate it!
-
Nutty Crunch: Add 1 cup of chopped nuts like walnuts or pecans to the cookie base for a satisfying crunch. The added texture pairs beautifully with the creamy fudge.
-
Dark Chocolate Lovers: Use 2 cups of dark chocolate chips instead of a mix for a more intense chocolate flavor. This variation elevates each bite into pure decadence!
-
Mint Chocolate Chip: Fold in 1 cup of mint chocolate chips into the cookie dough for an extra burst of minty goodness. It’s a surefire way to please any mint choc fanatic!
-
Dairy-Free: Swap out butter for coconut oil and use almond milk instead of evaporated milk to keep it vegan. This variation doesn’t compromise on richness while being perfect for those avoiding dairy.
-
Angular Appeal: Cut the bars into fun shapes using cookie cutters instead of squares for special occasions. A star shape for holiday celebrations can bring a festive flair!
-
Extra Fudgey: Pour an additional layer of hot fudge between the cookie base and the meringue for a double fudge experience. It’s for those who truly can’t get enough of that chocolatey goodness.
-
Spicy Kick: Add a pinch of cayenne pepper to the hot fudge for a surprising kick! The heat enhances the flavors and makes each bite unforgettable.
With these variations, your peppermint hot fudge bars can be tailored to suit any taste and occasion, ensuring everyone feels the love!
Peppermint Mocha Cookie Bars Recipe FAQs
What kind of butter is best for these bars?
Absolutely! I recommend using salted butter as it enhances the flavor of the bars. The salt adds a wonderful contrast to the sweetness, which makes each bite even more delightful. Just make sure to melt it before mixing for a smooth texture.
How should I store leftover peppermint hot fudge bars?
Simply place the bars in an airtight container and store them in the fridge for 3-4 days. This will help keep them fresh and maintain their delicious taste. If you notice any dark spots or an unusual odor, it’s best to discard them.
Can I freeze peppermint hot fudge bars?
Very! To freeze, wrap the bars tightly in plastic wrap and place them in a freezer-safe container. They’ll keep well for up to 2 months. When you’re ready to enjoy, just thaw them overnight in the fridge or let them sit at room temperature for a couple of hours before serving.
What should I do if my meringue isn’t whipping properly?
Oh no! If your meringue isn’t coming together, make sure that your mixing bowl and beaters are completely clean and dry, as any residue can affect the whipping process. It’s also a good idea to add a pinch of cream of tartar to help stabilize the meringue. Whip until you see stiff peaks, which should take about 5-7 minutes on medium-high speed.
Are there any dietary concerns with the ingredients?
Yes! Always check for allergies. The recipe includes eggs, dairy, gluten, and can contain nuts depending on any optional toppings. If you’re baking for someone with allergies, consider using egg substitutes or dairy-free butter to modify the recipe.
When is the best time to serve these bars?
I often recommend chilling the bars for a few hours after adding the hot fudge and meringue. This allows the flavors to meld beautifully and ensures that the texture is perfect when you slice into them. You can serve them after a quick 30-minute rest in the fridge for a gooey treat, or let them set in the fridge overnight for the best results!

Decadent Peppermint Hot Fudge Bars for Festive Indulgence
Ingredients
Equipment
Method
- Preheat your oven to 350°F. Grab a 9×9 metal pan, spray it with nonstick spray, and line it with parchment paper for easy removal later on.
- Melt the butter in a large mixing bowl. Next, whisk in the cocoa powder and espresso powder, followed by the brown and granulated sugars until smooth. Incorporate the eggs, vanilla, and peppermint extract, blending until combined.
- Combine the dry ingredients. Stir in the flour, baking powder, baking soda, and salt, making sure to mix well and catch any dry bits hiding at the bottom.
- Press the dough into your prepared pan, spreading it out evenly. Bake for 16 minutes until set, then cool in the pan on a wire rack until completely cooled.
- Prepare the hot fudge. In a medium saucepan, combine the chocolates, evaporated milk, and sugar. Heat on medium until it just reaches a low boil, stirring constantly. Remove from heat and mix in the butter, vanilla, and peppermint.
- Cool the hot fudge slightly, then pour 2 cups over the cooled bars. Place them in the fridge for a few hours or overnight until the fudge is perfectly set.
- Whip up the meringue until fluffy, add a touch of red food coloring and gently swirl it in. Pile the meringue on top of the chilled fudge layer and spread it out with a spoon. Sprinkle crushed candy canes on top for festive flair.
- Chill the bars in the fridge for up to 24 hours before serving, or slice and serve them after a quick 30-minute rest in the fridge. Store leftovers in an airtight container for 3-4 days.


