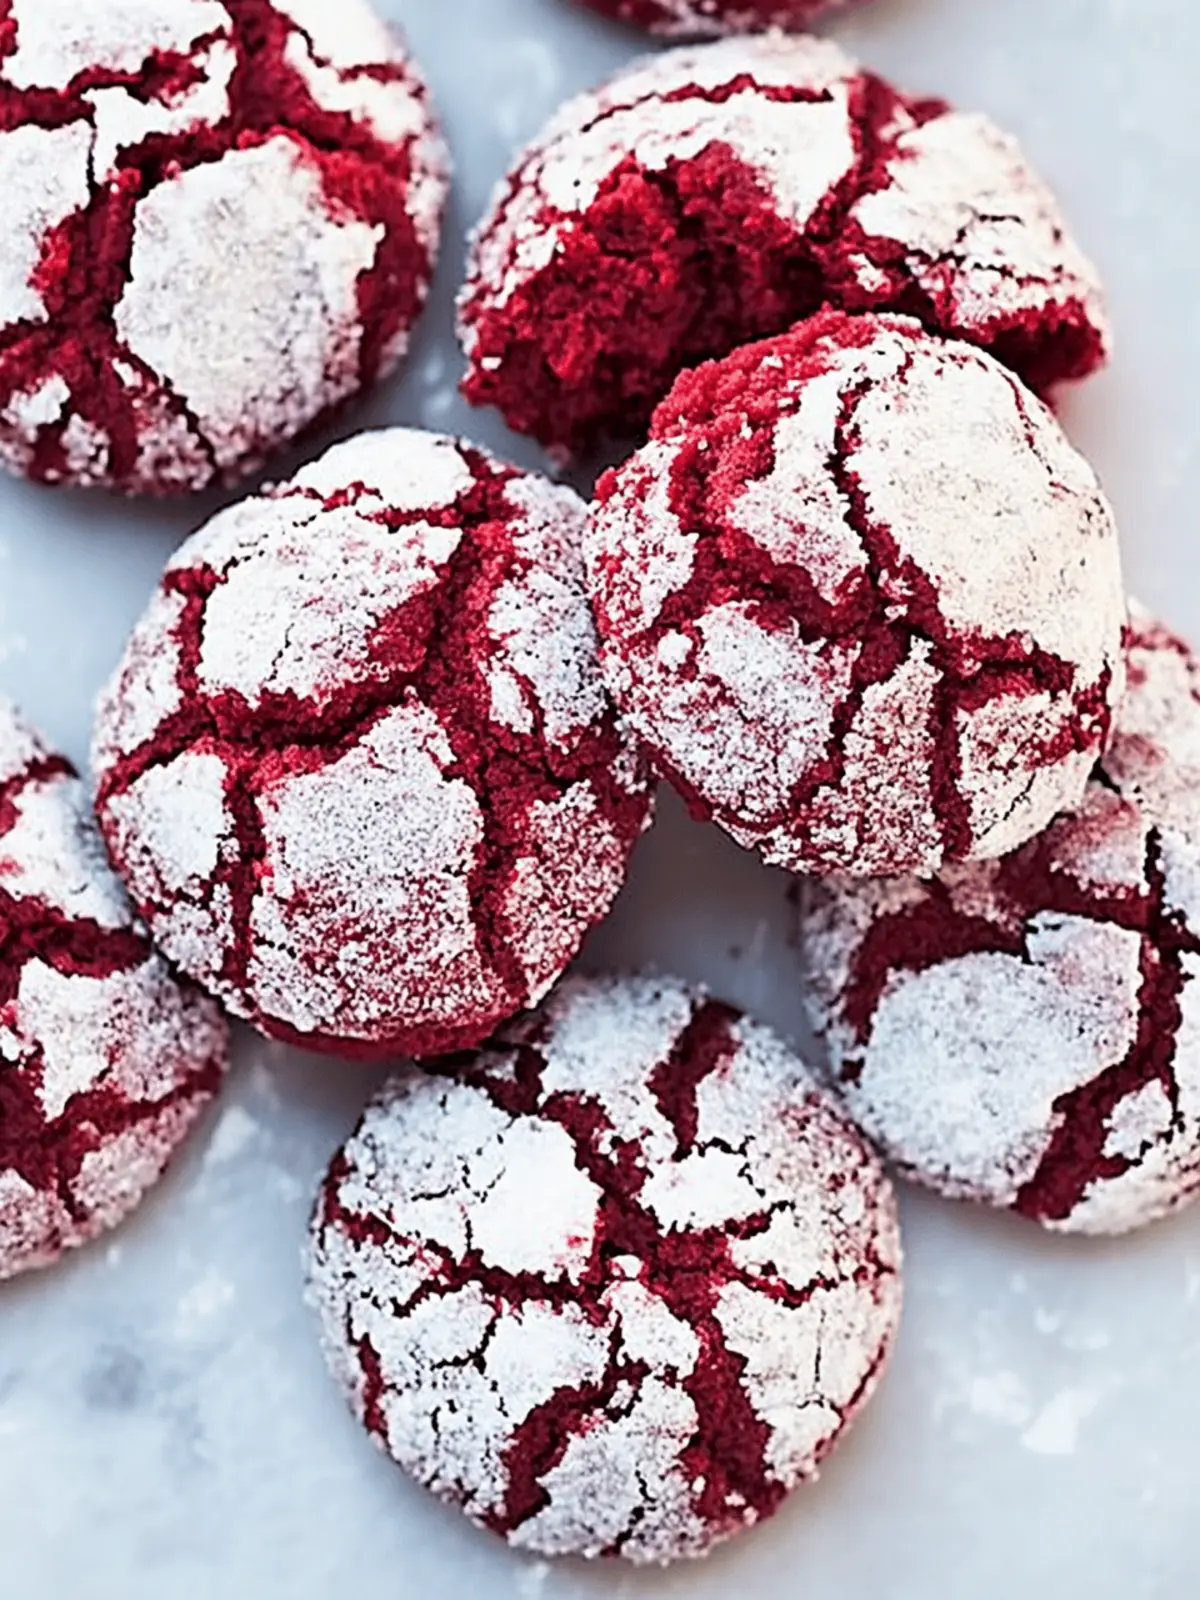
There’s something undeniably delightful about baking cookies that brighten up even the dreariest of days. Picture a kitchen filled with the warm, inviting scent of vanilla and chocolate—a comforting embrace that makes you feel at home. As I whipped up these Red Velvet Crinkle Cookies, I couldn’t help but marvel at the vibrant color that signals a delicious treat within.
These beauties aren’t just easy on the eyes; their rich, chocolatey flavor mingled with the surprise sweetness of white chocolate chips makes them a crowd-pleaser every time. Whether you’re gathering for a special occasion or simply want to indulge in something homemade, these cookies are the perfect answer to shake off the fast-food blues. Plus, the crinkly tops, dusted with powdered sugar like a sprinkle of sweetness, make them look as good as they taste. So grab your apron and let’s bring a touch of joy to your baking routine!
Why Choose Red Velvet Crinkle Cookies?
Irresistible Look: The vibrant red color and crinkly tops make these cookies a showstopper at any gathering.
Delicious Flavor: Combining rich cocoa with creamy white chocolate, each bite is a luscious experience.
Easy to Make: With a simple chilling process, you can whip these up with minimal effort.
Perfect for Any Occasion: Whether it’s a birthday, holiday, or just a cozy night in, these cookies fit right in.
Unique Gift Idea: These cookies wrapped up nicely make thoughtful homemade gifts that impress friends and family.
Treat yourself to the joyous experience of baking; your kitchen will never smell better!
Red Velvet Crinkle Cookie Ingredients
For the Dough
• 3 cups all-purpose flour – Essential for the structure that gives these cookies their perfect texture.
• 1/4 cup unsweetened cocoa powder – Adds that rich chocolate flavor which perfectly complements the red velvet.
• 2 tsp baking powder – Helps the cookies rise and achieve that delightful crinkle.
• 1/4 tsp baking soda – Enhances the cookie’s tenderness and aids in browning.
• 3/4 tsp salt – Balances the sweetness and enhances all the flavors beautifully.
• 3/4 cup unsalted butter, softened – Provides richness and helps create a soft, chewy texture.
• 1 1/3 cups granulated sugar – Sweetens the cookies and contributes to the lovely crinkled appearance.
• 3 large eggs – Binds the ingredients together and adds moisture.
• 1 Tbsp milk or buttermilk – Keeps the dough moist and helps achieve a tender cookie.
• 1 1/2 tsp vanilla bean paste or vanilla – Infuses a warm, aromatic flavor that complements the chocolate beautifully.
• 2 tsp lemon juice – Brightens the flavors and helps to activate the baking soda.
• 5 tsp red food coloring – The star ingredient that gives these cookies their stunning red hue!
• 1 cup white chocolate chips – Adds pockets of sweetness to each cookie, elevating the taste.
For the Coating
• 1 cup powdered sugar – Creates that delightful snowy finish that makes these cookies irresistible.
With each bite of these Red Velvet Crinkle Cookies, you’re not just savoring a treat; you’re indulging in a delightful experience that brings joy to your baking repertoire!
How to Make Red Velvet Crinkle Cookies
-
Whisk together the dry ingredients in a mixing bowl. Combine 3 cups of flour, 1/4 cup cocoa powder, 2 teaspoons baking powder, 1/4 teaspoon baking soda, and 3/4 teaspoon salt for 30 seconds, then set aside to allow flavors to meld.
-
Cream the butter and sugar. In the bowl of a stand mixer, whip together 3/4 cup softened unsalted butter and 1 1/3 cups granulated sugar until pale and fluffy, creating a dreamy base for your cookies.
-
Add the eggs. Mix in 3 large eggs one at a time, ensuring each egg is blended well before adding the next to create a cohesive batter.
-
Incorporate liquids. Mix in 1 tablespoon of milk or buttermilk, 1 1/2 teaspoons vanilla bean paste, 2 teaspoons lemon juice, and 5 teaspoons red food coloring until evenly combined for that gorgeous hue.
-
Combine dry and wet ingredients. With the mixer set on low, gradually add the flour mixture to the wet ingredients until just incorporated, taking care not to over-mix, which helps maintain a wonderful texture.
-
Fold in white chocolate. Carefully stir in 1 cup of white chocolate chips, ensuring they’re evenly distributed throughout the dough for delicious, gooey pockets of sweetness.
-
Chill the dough. Cover the bowl with plastic wrap and refrigerate the dough for 2 hours to firm it up, allowing for easier shaping into cookie balls.
-
Preheat the oven. While the dough is chilling, preheat your oven to 350°F (180°C) so it’s ready for your delectable cookies.
-
Prepare for coating. Pour 1 cup of powdered sugar into a bowl—this will create that delightful, magical snowy coating!
-
Shape the cookies. Remove the chilled dough from the fridge, scoop out portions, and with buttered hands, shape them into medium balls (about 2 1/2 tablespoons each).
-
Roll in powdered sugar. Roll each cookie dough ball in the powdered sugar to coat them evenly, creating a delicious sugary crust that enhances presentation.
-
Bake the cookies. Transfer the cookies to a Silpat or parchment paper-lined baking sheet, flattening them slightly. Bake in the preheated oven for 13-14 minutes until they appear crinkly and slightly soft.
-
Cool the cookies. Allow cookies to rest on the baking sheet for several minutes before transferring them to a wire rack to cool completely, letting them firm up and intensify in flavor.
-
Store properly. Keep your delightful Red Velvet Crinkle Cookies in an airtight container to maintain their freshness and taste for days to come.
Optional: For extra flair, dust with more powdered sugar before serving!
Exact quantities are listed in the recipe card below.

Expert Tips for Red Velvet Crinkle Cookies
-
Chill for Perfection: Don’t skip the chilling step! Chilling the dough helps achieve those gorgeous crinkly tops and prevents excess spreading.
-
Perfect Measurement: Use a kitchen scale to measure flour accurately; too much flour can lead to dense cookies.
-
Don’t Overmix: When combining wet and dry ingredients, mix just until combined to keep cookies soft and tender. Overmixing can lead to a tough texture.
-
Right Baking Time: Monitor baking closely! If cookies are too firm when you take them out, they may become dry. They should look slightly soft in the center; they’ll firm up as they cool.
-
Sugar Coating: For that beautiful snowy finish, make sure to coat the cookie dough balls thoroughly in powdered sugar before baking. This not only adds sweetness but enhances the visual appeal!
Enjoy every delicious bite of your Red Velvet Crinkle Cookies!
How to Store and Freeze Red Velvet Crinkle Cookies
Room Temperature: Store your cookies in an airtight container for up to 3 days to keep them fresh and chewy.
Fridge: For longer freshness, you can refrigerate them in an airtight container for up to a week. Just ensure they’re well-wrapped to prevent drying out.
Freezer: To freeze, place the shaped but unbaked cookie dough balls in a single layer on a baking sheet until firm, then transfer to a freezer-safe bag for up to 3 months.
Reheating: When ready to bake, preheat your oven and bake frozen dough without thawing, adding an extra 1-2 minutes to the baking time for delightful, fresh cookies anytime!
Make Ahead Options
These delightful Red Velvet Crinkle Cookies are perfect for busy home cooks looking to save time without compromising on flavor! You can prepare the cookie dough up to 24 hours in advance by following the chilling step and then covering the bowl with plastic wrap to keep moisture in. For best results, allow the dough to chill for 2 hours as directed, but if you need to prep even further ahead, consider freezing the shaped cookie balls for up to 3 months. When you’re ready to bake, simply roll them in powdered sugar and bake straight from the freezer, adding a minute or two to your cook time. This way, you’ll have fresh cookies ready to impress with minimal effort!
What to Serve with Red Velvet Crinkle Cookies?
Pairing these delightfully rich cookies with complementary dishes is the perfect way to create a memorable moment filled with sweet indulgence.
-
Creamy Vanilla Ice Cream: The cool, creamy ice cream balances the richness of the cookies, creating a delightful contrast in temperature and texture. It’s a classic that never disappoints!
-
Fresh Berries Medley: A mix of strawberries, blueberries, and raspberries adds a burst of freshness and acidity, brightening the overall flavor profile of your dessert spread.
-
Decadent Hot Chocolate: Serve with a mug of rich hot chocolate for the ultimate cozy treat. The warmth of the drink enhances the cookie’s chocolaty charm, perfect for colder days.
-
Chocolate Fondue: For the adventurous, dip these cookies in melted chocolate for an extra indulgent experience. The cookie’s crinkles soak up the chocolate, making every bite unforgettable.
-
Minty Mojito Mocktail: A refreshing mint-infused beverage provides a zesty contrast to the sweetness of the cookies, making it a delightful accompaniment for gatherings or summer parties.
-
Espresso or Coffee: The bitterness of a good espresso or coffee is the perfect partner for the sweetness of the cookies, intensifying the chocolaty flavors for a warm, satisfying treat.
-
Coconut Macaroons: These chewy, sweet macaroon bites bring a tropical twist and unique texture that pairs beautifully with the soft crinkle of the cookies.
-
Lemon Sorbet: The citrusy zing of lemon sorbet refreshes your palate between bites, creating a delightful balance with the deep flavors of red velvet and white chocolate.
Let your imagination and flavors dance as you create the perfect sweet experience around your cherished Red Velvet Crinkle Cookies!
Red Velvet Crinkle Cookies Variations
Feel free to unleash your creativity and customize these cookies to suit your taste buds!
- Gluten-Free: Substitute all-purpose flour with a 1:1 gluten-free flour blend for a deliciously inclusive treat.
- Nutty Twist: Incorporate 1 cup of chopped walnuts or pecans for a delightful crunch and earthy flavor.
- Mint Chocolate: Add 1 teaspoon of peppermint extract for a refreshing twist that pairs beautifully with the chocolate.
- Chewy Surprise: Swap white chocolate chips with dark chocolate chips for a richer, deeper flavor experience.
- Coconut Bliss: Fold in 1 cup of shredded coconut to add a chewy texture and tropical flair to these cookies.
- Spicy Kick: Add 1/2 teaspoon of cayenne pepper to the dry ingredients for a surprise heat that contrasts with the sweetness.
- Citrus Zing: Mix in the zest of one orange for a bright, citrusy note that will elevate the overall flavor.
- Dulce de Leche Drizzle: Top baked cookies with a drizzle of warm dulce de leche for an extra layer of indulgence.
Each variation offers a unique spin on your classic Red Velvet Crinkle Cookies, turning them into sweet creations that are sure to impress!

Red Velvet White Chocolate Chip Cookies Recipe FAQs
How do I know if my ingredients are fresh?
Absolutely! For the best results, ensure that your ingredients are fresh. Check your flour for moisture and clumps; it should smell neutral. The cocoa powder should be dark and rich, with no signs of expiration. For eggs, a simple test is to place them in a bowl of water; if they sink, they’re fresh!
How should I store my Red Velvet White Chocolate Chip Cookies?
Very! Store your cookies in an airtight container at room temperature for up to 3 days to keep them chewy. For longer storage, consider refrigerating them in an airtight container for up to a week. Just make sure they’re well-wrapped to prevent them from drying out.
Can I freeze the cookie dough? How?
Certainly! To freeze the cookie dough, first shape your dough into balls. Place these balls on a baking sheet in a single layer and freeze until solid, about 1 to 2 hours. Once solid, transfer them to a freezer-safe bag and store for up to 3 months. When you’re ready to bake, preheat your oven and bake the frozen dough straight from the freezer, adding an extra 1-2 minutes to the baking time for perfectly fresh cookies!
What should I do if my cookies come out flat?
Don’t worry; this happens to the best of us! If your cookies spread too much, it could be due to warm butter; ensure that it’s softened, not melted. Additionally, chilling the dough for at least 2 hours is crucial as it helps them maintain their shape. Finally, double-check your baking powder; it should be fresh—over time, it can lose its potency.
Are these cookies safe for my pets?
It’s best to keep these delicious cookies away from pets. The chocolate content, especially from the white chocolate, can be harmful to dogs and cats. Always consult your veterinarian if you’re unsure about certain ingredients or if you want to treat your furry friends safely.
Can I modify the recipe for dietary restrictions, like gluten-free?
Absolutely! If you’re looking for a gluten-free version, substitute the all-purpose flour with a 1:1 gluten-free flour blend, which should maintain a similar texture. Just make sure to also check the baking powder, as some brands contain gluten. For egg replacements, you can try flax eggs (1 tablespoon of ground flaxseed mixed with 2.5 tablespoons of water), but note that this may slightly alter the texture. Enjoy experimenting!

Decadent Red Velvet Crinkle Cookies That Wow Every Time
Ingredients
Equipment
Method
- Whisk together the dry ingredients in a mixing bowl. Combine 3 cups of flour, 1/4 cup cocoa powder, 2 teaspoons baking powder, 1/4 teaspoon baking soda, and 3/4 teaspoon salt for 30 seconds, then set aside.
- Cream the butter and sugar. In the bowl of a stand mixer, whip together 3/4 cup softened unsalted butter and 1 1/3 cups granulated sugar until pale and fluffy.
- Add the eggs. Mix in 3 large eggs one at a time, ensuring each egg is blended well before adding the next.
- Incorporate liquids. Mix in 1 tablespoon of milk or buttermilk, 1 1/2 teaspoons vanilla bean paste, 2 teaspoons lemon juice, and 5 teaspoons red food coloring until evenly combined.
- Combine dry and wet ingredients. Gradually add the flour mixture to the wet ingredients until just incorporated.
- Fold in white chocolate. Stir in 1 cup of white chocolate chips until evenly distributed.
- Chill the dough. Cover the bowl with plastic wrap and refrigerate the dough for 2 hours.
- Preheat the oven. Preheat your oven to 350°F (180°C).
- Prepare for coating. Pour 1 cup of powdered sugar into a bowl.
- Shape the cookies. Remove the chilled dough from the fridge, scoop out portions, and shape them into medium balls.
- Roll in powdered sugar. Roll each cookie dough ball in the powdered sugar to coat them evenly.
- Bake the cookies. Transfer the cookies to a baking sheet, flattening them slightly, and bake for 13-14 minutes.
- Cool the cookies. Allow cookies to rest before transferring them to a wire rack to cool completely.
- Store properly. Keep cookies in an airtight container to maintain freshness.


